We have all seen the pictures and videos of influencers, homemakers, and stay-at-home moms making their own custom soaps on Instagram and Pinterest. Whether it be for gifts, a business, or just for fun, it’s hard not to be drawn in by the allure of the beautiful shapes and colors and all of the delicious scents.
Well, if you are anything like me, then you have wanted to try making soap as well, but once you google “how to make soap” you get bombarded with information about the dangers of lye, all of the expensive equipment and ingredients required, different variations of soap bases, colors, scents… It gets very overwhelming, very quickly.
Lucky for you, I took the risk and tried making my own soap bars at home, and it was SO easy and fun that I thought I would break down the simplest process for soap making so others can enjoy this hobby as much as I do.
That’s why I am here today to share with you the easiest, quickest, and most simple way to try your hand in the world of soap making.
We are going to cut out all of the complicated and expensive variations of making soap because there will always be time to get into that if you decide this is something you want to further explore.
But the first step is to get you started, so that is exactly what we are going to do today.
Step 1: Gather your supplies
- Soap base
- Fragrance oil
- Soap dye
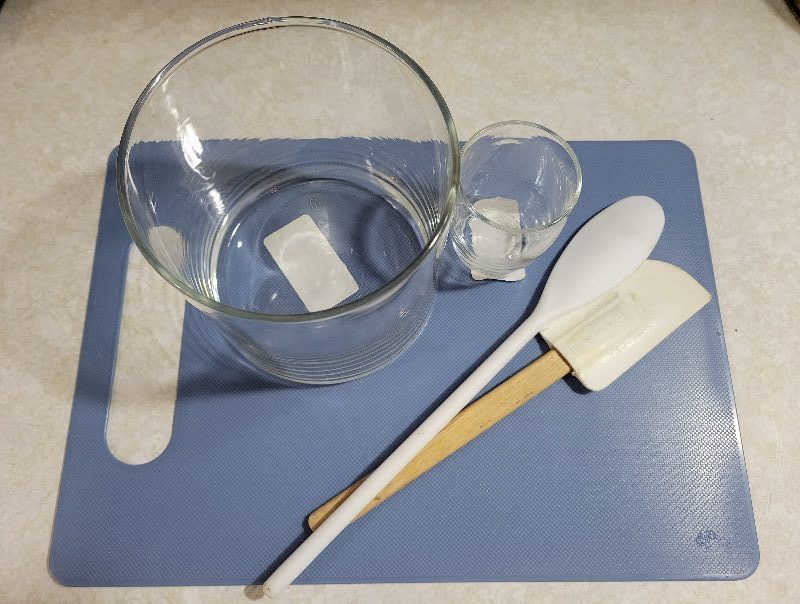
- 1 Large glass or plastic container
- 1 Small glass container
- 1 Spatula/spoon
- Cutting board
- Soap molds
- Wax paper
- Kitchen scale
- Optional– Soap additives (lavender, loofah, glitter, etc.)
Soap base: Since we are taking the easy route with this, we are going to start with a premade soap base that can simply be melted, mixed with the color and fragrance of your choosing, and then poured into the mold. Simple as that!
Personally, I prefer Primal Elements (paid link) melt-and-pour soap base. They sell in bulk sizes (2lb-10lbs blocks) and they have a great variety of different bases, scented and unscented, infused with things like shea butter, aloe vera, oatmeal, cocoa butter, honey, argan oil, and olive oil. When it comes down to choosing which base to use, it’s really just a matter of preference, whether you want your soap to be more moisturizing, cleansing, or aesthetically pleasing.
Since melt-and-pour soap is pre-made soap, the lye has already been neutralized in a process called saponification which makes it safe for skin contact and handling. However, I would still suggest making your soap in a well-ventilated area!
Fragrance oil: You may be surprised to find out that you can simply use your favorite essential oils to scent your soaps. You will want to make sure to use oils that are cosmetic-grade and safe for skin contact. Avoid scents like cinnamon, black pepper, thyme, citrus (lemon, orange, bergamot), and peppermint as these are known to cause skin irritation with direct contact.
Soap dye: Finding soap dye should be fairly easy. Do you still have a box of food coloring that has been sitting in your cabinet since the last time you made your kid a birthday cake? Great, you can use that! Now, food coloring isn’t highly suggested for soap making as the colors can distort and tend to fade faster than dyes that are made for cosmetic uses. Fortunately, finding soap dye is pretty easy and inexpensive. I got mine on Amazon (paid link) there are lots of great options from all colors of the rainbow to lower and higher quality dyes depending on your preferences and preferred price point. You can also use cosmetic-grade mica pigments for coloring.
Supplies: As stated above you’ll need a spatula or long spoon, and a large and a small container preferably made of glass that will NOT be used for food again after this use. Even the simple melt-and-pour soap bases can still contaminate the containers used for making, so you’ll want to dedicate the equipment that you use to non-food-related projects going forward.
Since kitchenware is so expensive these days (and you really don’t need the fanciest equipment for this) I went to the thrift store to pick up my soap-making supplies! I found large and small glass containers, spatulas, and even a cutting board all for under $5! If you don’t want to sacrifice a cutting board, you can simply wrap your cutting board in wax paper to keep it clean and safe.
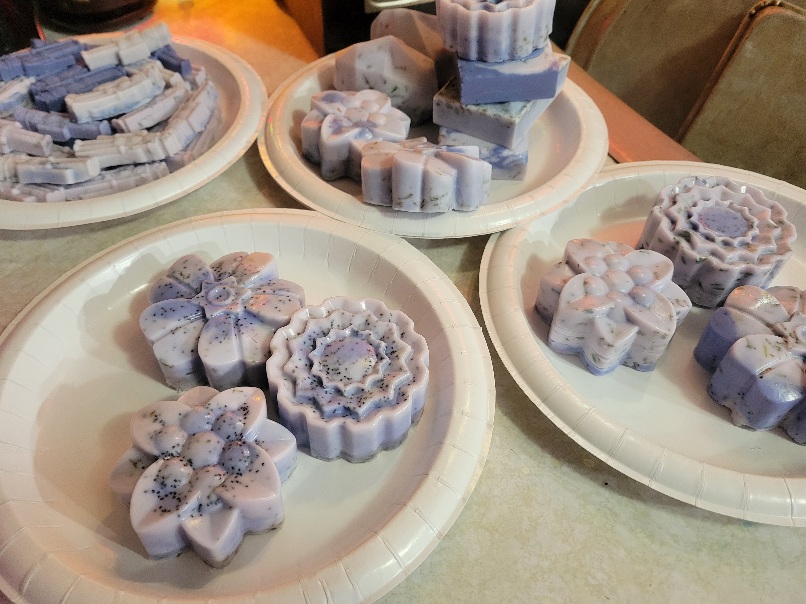
You can buy specific molds made for soap, or you can use any silicone baking trays that you find. I bought some cute flower molds and some basic bricks from Michaels for around $8 per 6-piece mold. I also found a cute little nutcracker baking mold at Walmart that I used for making soaps around Christmas time that worked perfectly!

Exfoliants: This is one of the best parts of making your own soap. Adding fun stuff to it! You can find packages of lavender, poppy seeds, dried flowers, biodegradable glitter, and lots of other options at any crafting store like Michaels or Joanns, and of course online (paid link). You can buy slices of dried loofah that are a great addition to your soap bars as well. The last time we made soap bars we dehydrated some huckleberries from last summer’s frozen stash and added the dehydrated huckleberries as an extra (fancy) exfoliant!
Now that we have all of the supplies, let’s get started!
Step 2: Mix your ingredients
First, you will want to weigh out your fragrance. Having this prepared for when it comes time to add the fragrance to the soap base is important so that the soap base doesn’t begin to harden while you are weighing out the fragrance oil.
Use your kitchen scale and the small glass container to weigh out 0.5 oz of fragrance oil per 16 oz of soap base that you will be using.
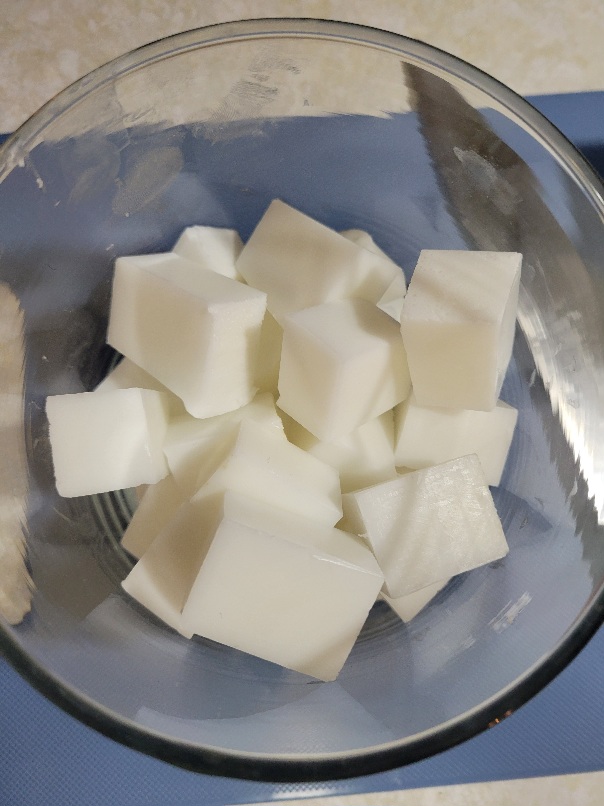
Next, you are going to cut your soap base block into 1” squares and weigh 16 oz of the cut-up soap base in the large container. Melt in the microwave, stirring at 30-second intervals. Make sure your soap base does not begin to bubble, if you see bubbles forming remove it from the microwave and continue to stir until smooth.
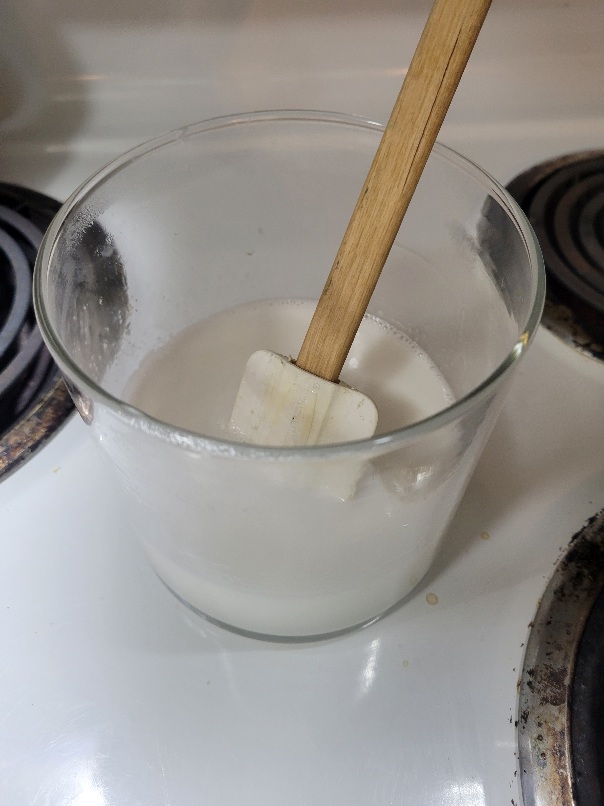
Once most of the chunks have melted in the soap base, it is time to add the fragrance oil that you measured out before. Stir in completely. If the soap base begins to harden you can put it back into the microwave for a few seconds to keep it liquified.
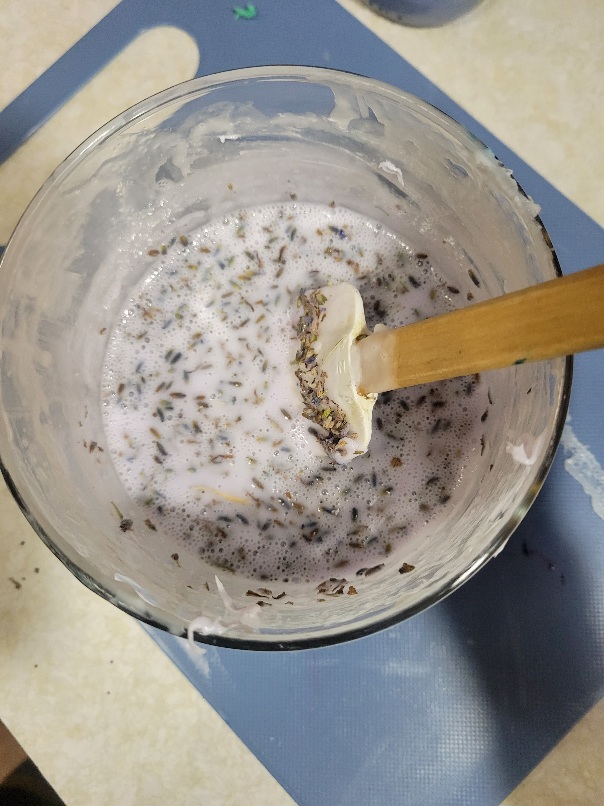
After the scent has been added, it’s time to add the color! It is suggested to use 1-3tsp of coloring per 16 oz of soap base, however, you can add as much or little as you would like to achieve your desired color/shade. If you want to mix colors, split your scented base and color accordingly!
Now that you have the scent and color that you desire, you can mix in any exfoliants that you want to use. Personally, I love using poppy seeds in mine!
Step 3: Pour your soap!
Now that your soap base has color and scent, it’s time to pour your mixture into the molds! Make sure your molds are clean and completely dry, and pour your soap mixture slowly into the molds up to the rim. If you’re using more than one color you can alternate the colors as you fill the mold to get a fun swirly effect!
If you notice bubbles forming around the edges of your soap in the mold you can spritz isopropyl alcohol from a spray bottle over the soaps to help reduce the bubbling.
Let your soap bars set until completely solid (anywhere from 30 minutes to 24 hours, depending on the soap brand and your mold size), and they’ll be ready to pop out of the mold to use, gift, or sell! Soaps made with oils tend to lose fragrance over time (roughly a year or so), so it’s best to wrap your soap bars in plastic to help them stay fresher for longer!
You did it! You made soap for the first time, good job!
I hope you had as much fun as I did, and I hope you enjoyed my quick tutorial on making simple bars of soap. Hopefully, you to feel inspired to start doing a deeper dive into all of the more complicated, fun, and exciting factors of soap making.
Thanks for reading!
-Jessica C.
Disclaimer: As an Amazon associate, I earn from qualifying purchases at no additional cost to you!

Leave a comment